
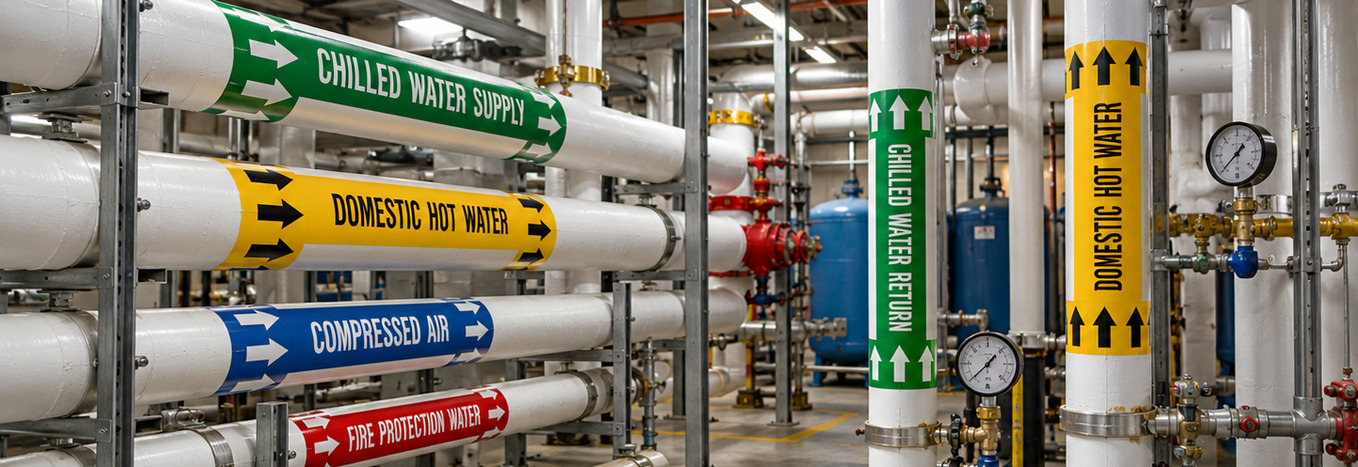
Effective labeling for these complex piping systems relies on understanding the different types of pipe markings and the key elements of effective labeling in accordance with standards such as ANSI/ASME A13.1.
That’s why we’ve created this guide to help you understand all the requirements for properly marking your pipelines and ensuring safety, from choosing the right label type and content to placing, auditing, and replacing your markings.
If you’re ready to bring your facility’s pipe marking up to standard, here is what you need to know.
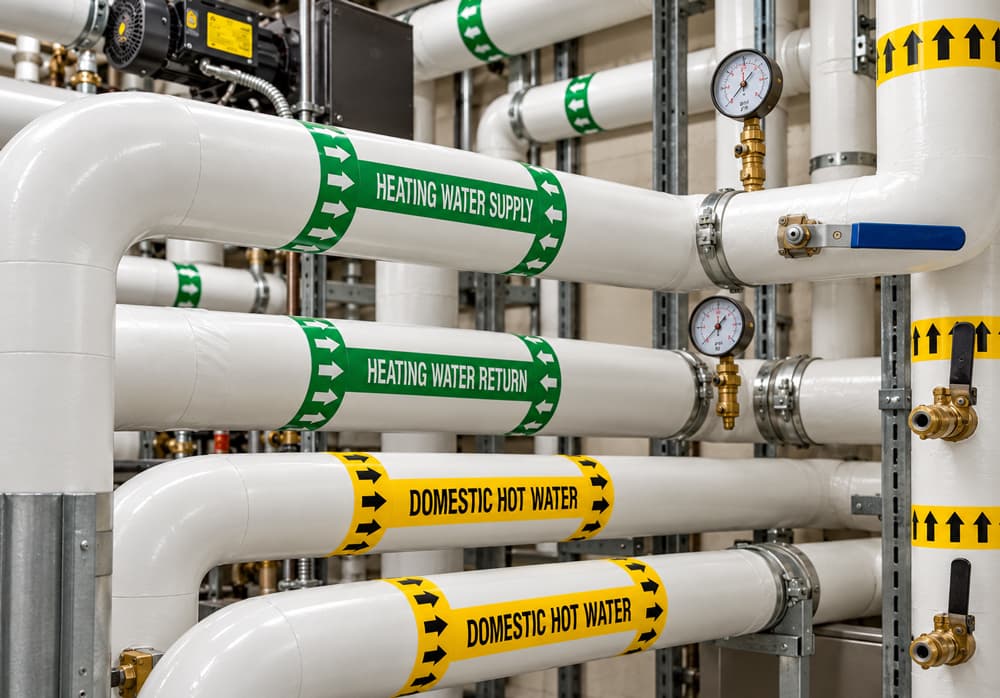
Core Elements of a Pipe Marking Label
Regardless of the type, every pipe label should include the essential elements recommended by standards such as ANSI/ASME A13.1 to serve its purpose effectively. These are the main pipe label elements that must be present to ensure the clarity and effectiveness of your markings:
Contents text
Clear text that identifies exactly what the pipe carries.
Standard color code
A background and text color that signals the hazard or fluid type.

Flow direction arrows
Arrows showing which way the contents travel through the line.
Lettering size and font
Letter height and label length sized to the pipe diameter for legibility.
Color Codes:
Most facilities follow the ANSI/ASME A13.1 guidelines for pipe labeling, which use color to communicate the hazard class of a pipe’s contents at a glance. The ANSI/ASME A13.1 color code includes six standard colors and four user-defined colors that are as follows:




It’s important to choose the right type of label based on the pipe’s environment and contents to ensure durability and clear communication. For example, use high-temperature-resistant materials for pipes exposed to heat, and chemical-resistant labels with compatible adhesives in corrosive environments.
Placement of Pipe Labels
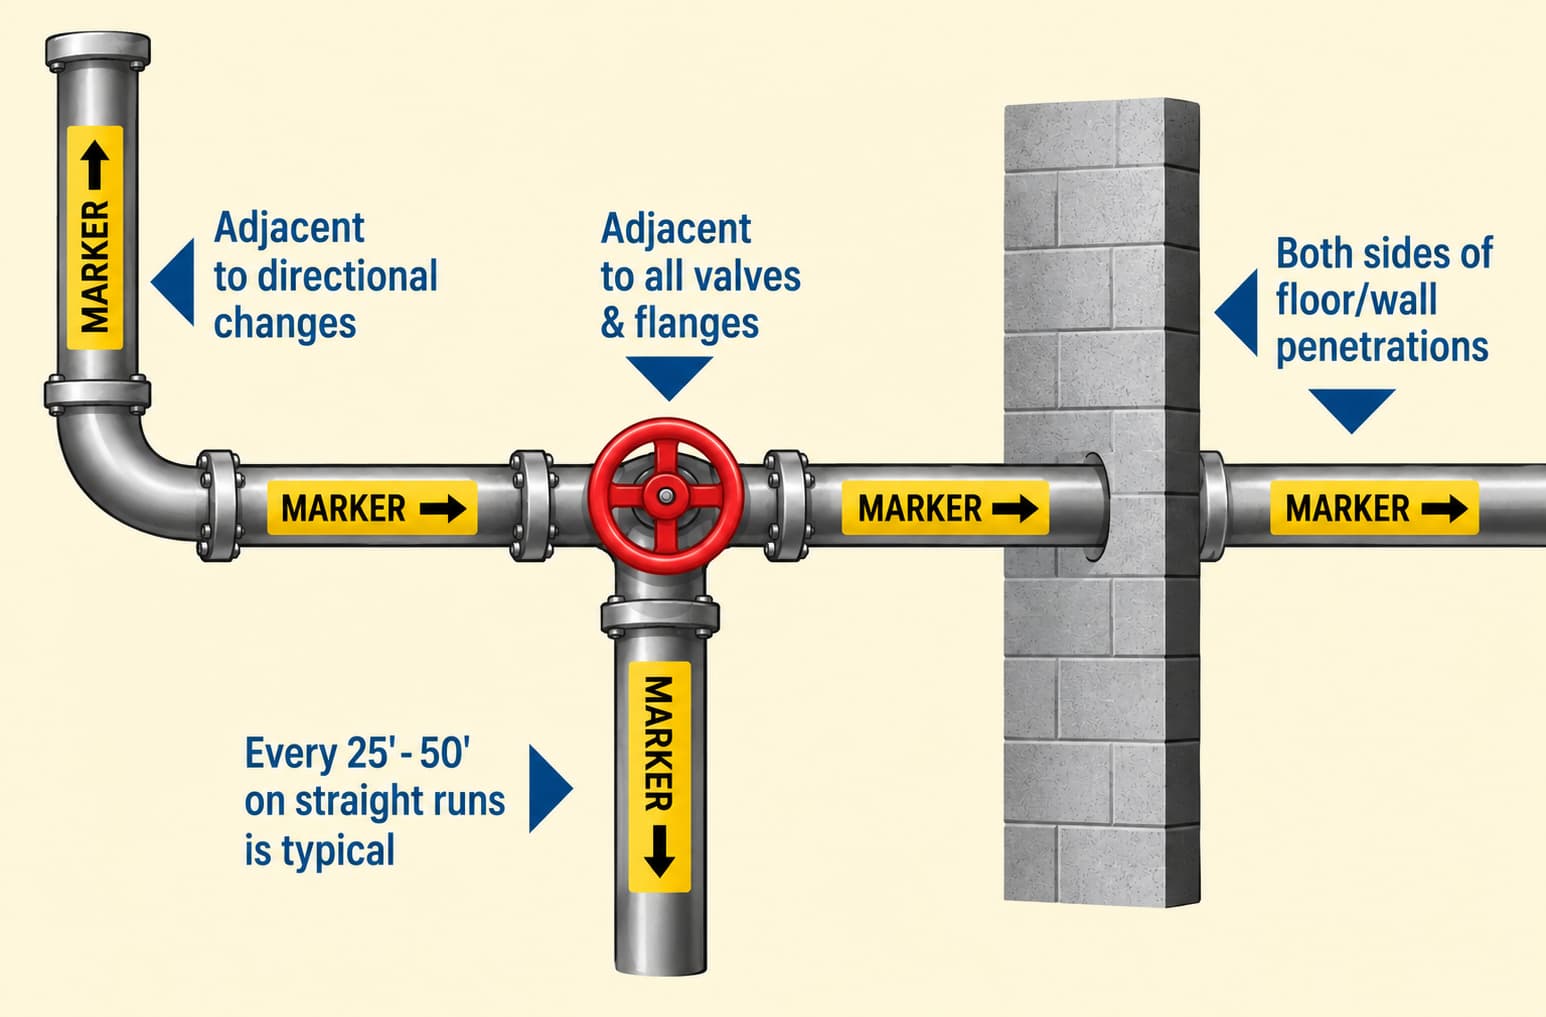
Proper placement of pipe labels is as important as having the correct content and color on the label, and it depends on location and visibility. Consider the following guidelines when applying your pipe labels:
- Straight runs: Place labels every 25 to 50 feet, or more frequently in low-light or congested areas.
- Changes in direction: Apply labels at every bend or change in direction.
- Valves and flanges: Place labels on both sides of each valve and flange.
- Penetrations: Label pipes on both sides where they pass through walls, floors, or ceilings.
- Viewer’s perspective: Orient the label so it’s readable from the most common viewing angle.
Pipe Marking Audit
Effective pipe labeling is not a one-time project but an ongoing process that requires regular auditing and maintenance to ensure ongoing compliance, safety, and operational efficiency. Here is a step-by-step process to conduct a pipe marking audit:

Form a Team
Include members from maintenance, safety, and operations. For larger projects, consider consulting a map or diagram of the facility's piping network.
Conduct a Physical Walkthrough
Systematically inspect all pipes, valves, and associated tags. Document all pipes and their contents, location, and condition. Pay special attention to systems carrying chemicals, steam, or pressurized materials.

Check for Compliance
Ensure all markings comply with industry standards, such as ANSI/ASME A13.1.

Verify Label Placement
Check if all labels are placed at required locations according to standards.

Look for Needed Replacements
During the audit, identify and log labels that need replacement.
After completing the audit, use a checklist to ensure all critical areas were inspected and a list of needed pipe labels has been created. Then arrange materials for replacement, such as premade labels or pipe marking rolls that meet the identified needs for durability, cost-effectiveness, and compliance.

Replacing Pipe Labels
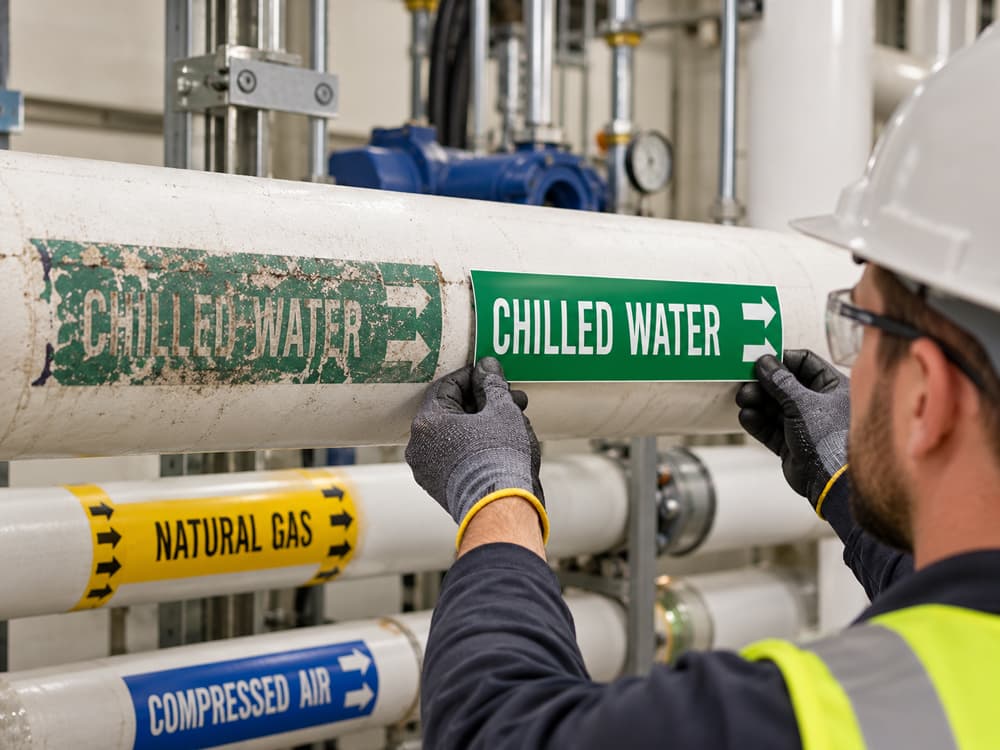
After conducting a pipe marking audit, you may find labels that need replacement. Replace the existing pipe markings if they are damaged, have poor visibility, outdated information, incorrect labeling, or incorrect color codes. When replacing your labels, ensure compliance with relevant pipe marking standards to ensure clarity and safety.
Now that you know the essentials of maintaining accurate and compliant pipe markings, let’s take a closer look at the advantages of following recognized standards and best practices in pipe labeling.
Benefits of Effective Pipe Marking
Proper pipe marking is important for every facility and offers numerous benefits, including:
Clear identification of pipe contents
Ensures workers know what’s inside each pipe for safe handling and informed decision-making.
Simplified maintenance
Helps maintenance teams quickly assess repair needs and select appropriate materials.
Faster upgrades
Streamlines project planning and execution for more efficient system upgrades.
Accident and injury prevention
Reduces the risk of incidents and serious injuries by clearly identifying potential hazards.
Visual aid for new employees and contractors
Provides instant, easily understood information to minimize confusion and promote safety.
By improving visibility and communication, pipe marking improves safety, efficiency, and compliance throughout a facility.
Get Your Pipes Labeled the Right Way
Effective pipe labeling requires a well-structured system of color-coding, clear text for contents, and directional arrows, all applied using appropriately sized and placed labels that are durable against environmental conditions. Regular audits and timely replacement of damaged or outdated labels are essential to maintaining compliance and ensuring ongoing workplace safety.
Get the Free Pipe Marking Guide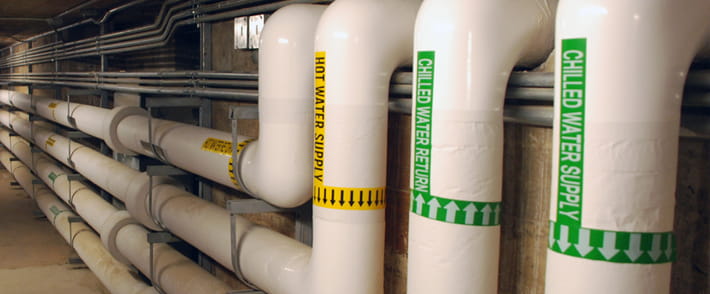
Helpful Resources