Text From Infographic
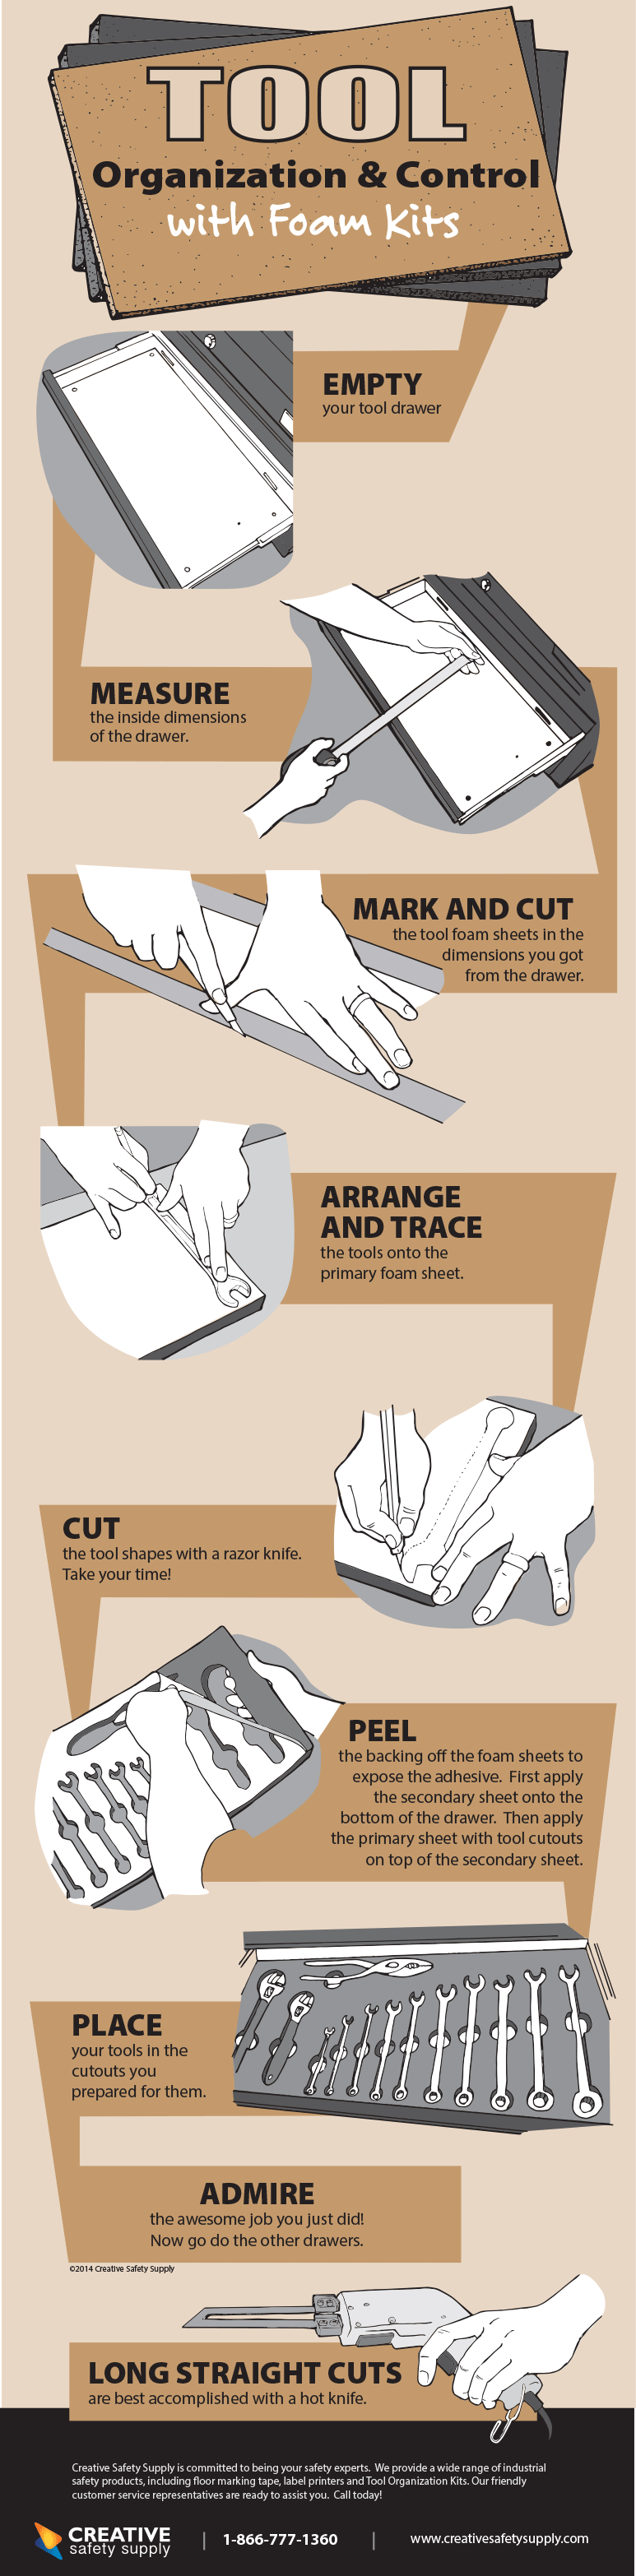
Tool Organization and Control with Foam Kits
- EMPTY your tool drawer.
- MEASURE the inside dimensions of the drawer.
- MARK AND CUT the tool foam sheets in the dimensions you got from the drawer.
- ARRANGE AND TRACE the tools onto the primary foam sheet.
- CUT the tool shapes with a razor knife. Take your time!
- PEEL the backing off the foam sheets to expose the adhesive. First apply the secondary sheet onto the bottom of the drawer. Then apply the primary sheet with tool cutouts on top of the secondary sheet.
- PLACE your tools in the cutouts you prepared for them.
- ADMIRE the awesome job you just did! Now go do the other drawers.
- LONG STRAIGHT CUTS are best accomplished with a hot knife.
Creative Safety Supply is committed to being your safety experts. We provide a wide range of industrial safety products, including floor marking tape, label printers and tool organization kits. Our friendly customer service representatives are ready to assist you. Call today!
Similar Infographics
- 5S is the Foundation of any Lean Program
- The Importance of Industrial Label Printers
- Gemba: A Powerful Piece of your Lean Toolbox
- Stay on Top of Ladder Safety
- Eye Injuries in the Workplace
- GHS Timeline: What's Next?
- 10 Astonishing Facts about Arc Flash
- The 12 Days of Christmas Safety
- Marking Floors to Communicate Social Distancing
Additional Resources
Use tool foam kits to keep tools organized
Foam tool kits can help you organize tools in your workspace by creating shadow boards that keep tools in place and highlight when they’re missing. Read this infographic to learn how to use these foam kits. Once you get the hang of it, using foam tool kits for tool organization is easy to do. They’re also a great tool to use as part of a 5S program or in areas where people share tools.
Copyright © 2016 Creative Safety Supply


